Start here
Just purchased the InkFlow Template? Learn how to use the Template here.
Getting Started
Thank you for purchasing the InkFlow Template. In this short Guide you will learn how to edit the Templates Colors, Fonts, Graphics & more.
If you are new to Webflow we highly recommend you to watch the free Webflow 101 Crash Course made by the Team over at Webflow University. It covers all the Basics of working with Webflow and serves as the perfect entry point to get started quickly.
Styling
Let's learn how to start making Style changes to this Template.
Colors
This Template was built using Color Variables. This makes it incredibly easy to update all colors site-wide.
To change the Colors you have to got to the Variables Tab in the left sidebar, then pick find the color swatch you wish to change, and then click on the Value to update the color. The change will then be reflected site-wide.

Fonts
Since we want to make editing this Template as easy as possible for you, we decided to also assign the Font to a Variable.
You can change the Font Variable by going to the Variables Tab on the left Sidebar. There you can find the Font at the very top of the Page. Select the Value and pick the Font you wish to choose.
If you wish to choose a different Font that is not natively available on Webflow, you can go to the Page Settings and either choose a Google Font or upload your own custom Font there.
Icons
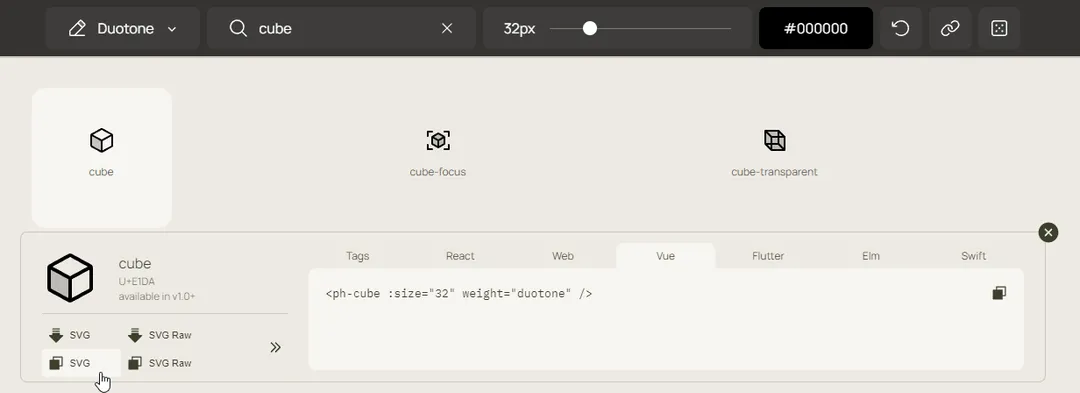
To give you a large selection of Icons we decided to use the following free Icon Library: Phosphor Icons
The Phosphor Icon Library comes with over 6000 Icons and is frequently being updated with more Icons to choose from.
For some Icons we used SVG Embeds. This gives us the ability to change the colors within Webflow. These Embeds are used in places where the Color of the Icon changes, for example, on hover (Social Media Icons, etc...)
To change the Icon you have to copy the svg code from Phosphor Icons and paste it into the code block that can be accessed when clicking on the settings icon of the html embed.
You can also get the Phosphor Icons from the Relume Icon Library. Getting them from there is a much cleaner and simpler process when it comes to pasting in Icons and editing their size & color.
Editing Page Content
After making all the Style changes it's time to add your own content. In this Section we'll look into the static pages, as well as the dynamic Pages (CMS & E-Commerce Pages).
Static Pages
Changing the Content of the Text Boxes is a simple as hovering over the Text Box you wish to edit and then double clicking on it. Now you can freely change the text and replace it with your own copy.
Editing the Images is also simple and straightforward. Select the Image you wish to swap out, click on the settings icon and pick the Image you wish to use from the Assets Panel.
Dynamic Content (CMS)
Editing the Content of dynamic Pages, such as Blog Posts or Team Members, we will have to take a different approach than above.
We can update & add all CMS Content in the CMS Tab that can be found in the left sidebar. In the CMS Menu you can select the Collection and then either click on an already existing CMS Item or add a new Item by clicking on the blue Button in the top right corner.
Every new CMS Item (for example, a Blog Post) create a new dynamic CMS Page.
E-Commerce Content
The E-Commerce Collections can be edited in the same way as the CMS Collections. You can find them in the E-Commerce Tab on the left side-bar.
Important Notes
Apart from the basic editing of pages, there is also a key set of features important to editing your new Template. These features include Interactions, Breakpoints and Meta Data.
Interactions
To remove or add Interactions, select the Element and go to the Interactions Tab on the right side-bar.
Here you can edit all Interactions applied to the Element, or add an Interaction to it.
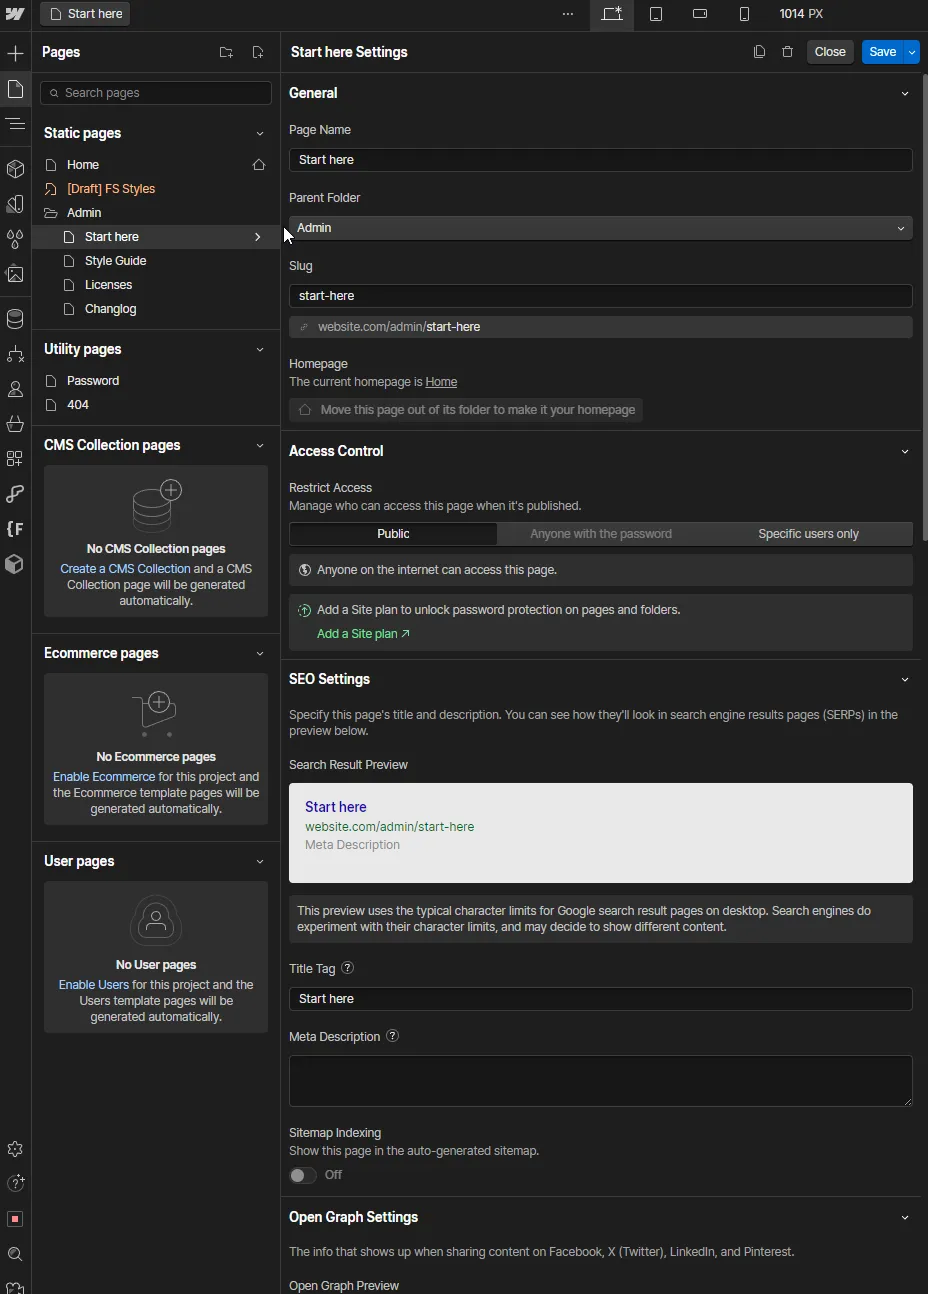
Meta Data
To change the Meta Data of the Template (SEO, Sharing, etc...) you can go to the Pages Tab on the left side-bar and click on the settings icon of the Page you wish to edit. In this new Menu you can change all the Meta Data for that specific page, such as Name, slug, Open graph Image and more.
Meta Data
Support
As you can see, customizing the Template is very easy. However, should you require additional help or find any issue, feel free to send us an email at contact@flowversity.tech. We will be happy to help and get back to you as soon as possible.